
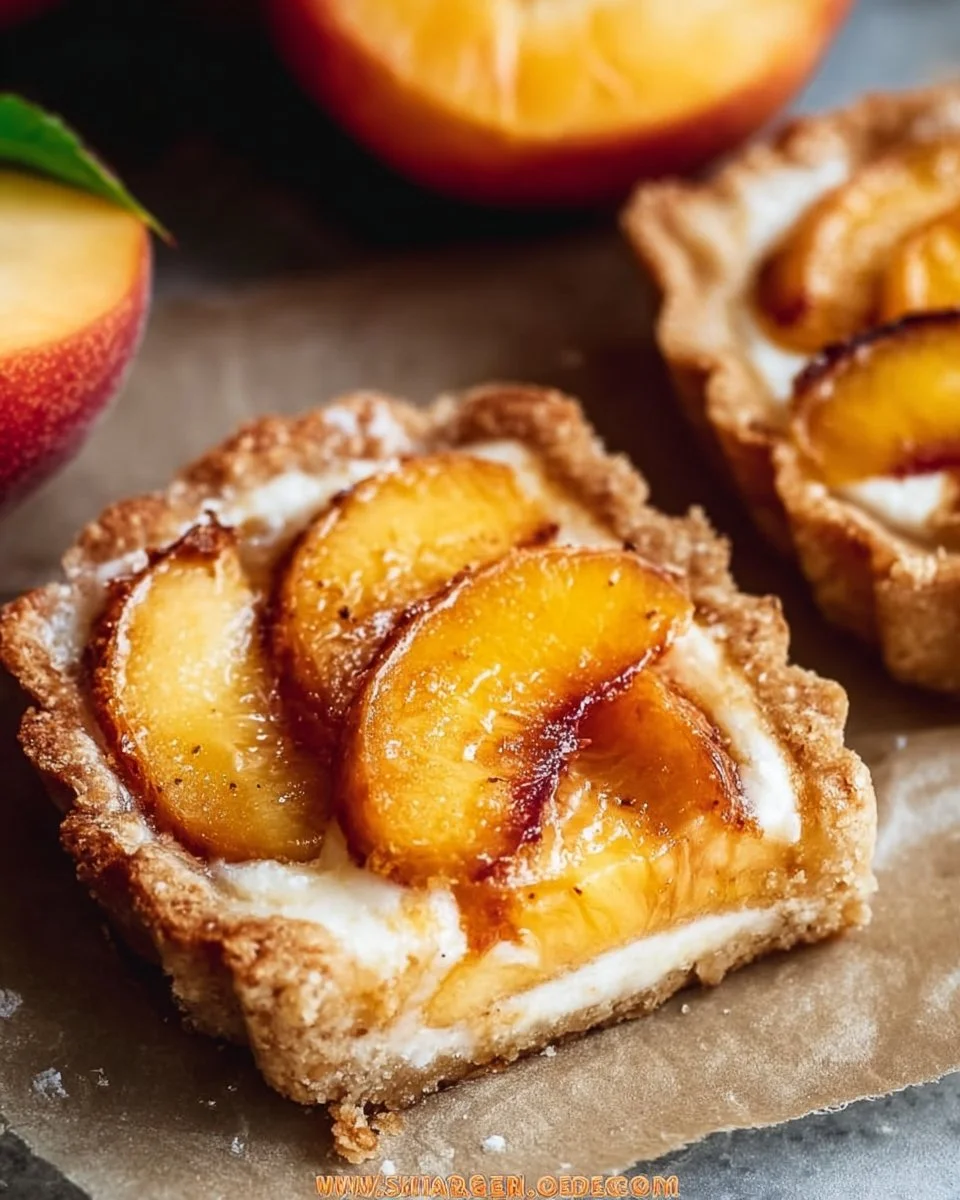
There’s something truly special about the magic that happens when sweet, ripe peaches meet a luscious cream cheese filling nestled in a delicate pastry shell. These Mini Peach and Cream Cheese Tarts are like little bites of sunshine, combining the crispness of the crust with the creamy goodness of the filling and the juicy sweetness of fresh peaches. Honestly, they’re a staple in my kitchen whenever summer rolls around, and I can’t resist making them for family gatherings or just to enjoy on a lazy afternoon.
These tarts come together surprisingly fast, making them perfect for those busy weekdays when you want something homemade but don’t have hours to spend in the kitchen. They’re incredibly versatile—wonderful as a dessert for dinner parties, a sweet addition to brunch, or even a simple afternoon treat with a cup of coffee. And if you happen to have leftovers (which is rare in my house!), they store beautifully for about three to four days in the fridge.
Why I Love Mini Peach and Cream Cheese Tarts
There’s a lot to adore about Mini Peach and Cream Cheese Tarts! They hit that sweet spot of being incredibly easy and undeniably delicious. The flavor profile is a delightful dance between creamy, sweet, and subtly tangy, all enveloped in a flaky, tender crust. They’re a true winner at my table, elevating any occasion with their elegant presentation and fantastic taste.
Mini Peach and Cream Cheese Tarts Ingredients
The magic of these Mini Peach and Cream Cheese Tarts truly lies in the simplicity of the ingredients. Don’t worry about exact measurements just yet; those are all in the recipe card for you!
Essential Components
- 1 SHEET OF HOMEMADE PUFF PASTRY: This flaky goodness is the foundation, providing a buttery crunch that pairs beautifully with the filling.
- 2 RIPE PEACHES, SLICED: Fresh peaches are the stars! Their juicy sweetness shines through, making every bite a refreshing experience.
- 1/2 CUP CREAM CHEESE, SOFTENED: Lush and creamy, it balances the sweetness of the peaches with its slight tanginess.
- 1 TABLESPOON HONEY: This little gem packs a punch of natural sweetness that enhances all the flavors without overpowering them.
- 1/2 TEASPOON LEMON JUICE: A touch of zing to brighten the whole tart, making the flavors pop.
- 1/2 TEASPOON CINNAMON: Just a hint of warmth and spice, it ties everything together beautifully.
Need a Swap?
Want to switch things up? If peach season has come and gone or you crave something different, feel free to substitute with plums or nectarines—each will give a unique twist to the tart! For the cream cheese, mascarpone or even a flavored cream cheese (like honey or vanilla) could work wonderfully, though it won’t be quite as rich.
A practical tip: If you’re in a pinch for time, using store-bought puff pastry speeds things along. Just note that the flavors are always better with the homemade touch!
Kitchen Tools You’ll Need
- Mini tart pan (or a muffin tin if you don’t have one)
- Rolling pin
- Mixing bowl
- Whisk
- Fork
- Baking sheet
How to Make Mini Peach and Cream Cheese Tarts
Let’s dive into creating these delightful Mini Peach and Cream Cheese Tarts. I’ve broken down the process into simple steps. Follow along, and you’ll have a delicious treat in no time! We’re aiming for perfectly golden crusts filled with a creamy dream and topped with fresh peaches.
Preheat and Prepare
First, preheat the oven to 375°F (190°C). This step is key to ensuring that our tart crust bakes up crispy and golden!
Roll and Cut the Dough
Next, roll out the puff pastry on a lightly floured surface and cut it into four small rounds that will fit perfectly into your mini tart pan. Don’t worry about making them perfect—imperfections add charm!
Press and Prick
Now, press the pastry rounds into the tart pan, making sure to cover the edges nicely. Use a fork to prick the bottom of each pastry; this prevents them from puffing up too much in the oven.
Bake Until Golden
Once your tarts are ready, bake for about 15-20 minutes until they’re golden brown. The aroma wafting through your kitchen will be utterly divine!
Mix the Creamy Filling
While the tarts are baking, grab a medium mixing bowl and combine the cream cheese, honey, lemon juice, and cinnamon. Whisk until smooth and creamy; this filling will be the heart of our tarts!
Spoon in the Cream Cheese Mixture
Once the tarts are cooled, gently spoon the cream cheese mixture into each tart shell. Don’t be shy—fill them up!
Top with Fresh Peaches
Now comes the best part: topping the tarts with those beautiful peach slices. Arrange them nicely on top so each tart is bursting with color and sweetness.
Drizzle with Honey and Serve!
Finally, if you’d like, drizzle a touch of additional honey over the peaches for that extra touch of sweetness. You can serve them immediately, or let them chill in the fridge for a bit to make them refreshing!
How to Store Mini Peach and Cream Cheese Tarts
These delightful tarts keep well, maintaining their flavor and texture beautifully. At room temperature, they’re best enjoyed the same day, but in the fridge, they’ll stay fresh for about three to four days in an airtight container. If you want to freeze them, they can last up to two to three months—just thaw in the refrigerator before serving!
Tips for Success
- Ensure your puff pastry is fully thawed; otherwise, it won’t roll out easily.
- Avoid overbaking the tarts since burnt pastry loses its delicate flavor. Keep an eye on them!
- Allow the tarts to cool completely before adding the cream cheese filling to maintain that lovely texture.
- Opt for ripe peaches for the best flavor—soft but not mushy!
Serving Suggestions
- Serve warm or chilled for a refreshing dessert twist.
- Pair with a scoop of vanilla ice cream for a decadent treat.
- Offer at brunch alongside coffee or herbal tea for a delicate sweet note.
- Garnish with a sprig of mint for a fresh look.
- Place on a beautiful platter for a stunning table presentation!
These Mini Peach and Cream Cheese Tarts are not just a recipe—they’re a joyful experience to share. Enjoy making them, and even more, enjoy sharing (or savoring!) them all on your own!
Leave a Comment